Announcements
Completing a US Visa Application in Nigeria can be the starting point for a life full of opportunities. Studying, traveling, or working in the United States becomes possible once you understand the necessary steps.
Although the process requires attention, having the right information helps you avoid mistakes, save time, and feel more confident. Being clear about what to expect makes everything much simpler.
Do you want to understand every detail and not get lost at any stage? Keep reading to discover how to carry out your US Visa Application in Nigeria smoothly.
Announcements
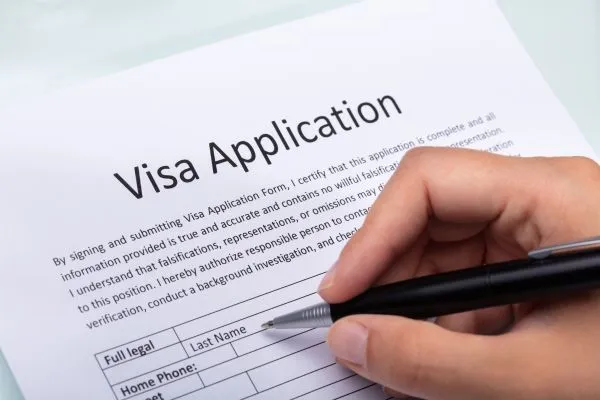
How to Complete the DS-160 Form
The DS-160 is the initial step in the process and is essential for anyone wishing to make a US Visa Application in Nigeria. It must be completed in English, online, through the official U.S. Department of State portal.
Here’s how to fill it out:
Announcements
- Access the U.S. Department of State portal
- Select “Nigeria – Lagos” or “Nigeria – Abuja”
- Enter accurate information: name, address, occupation, income, travel plans, and family details
- Fill out everything carefully, without leaving blank fields
- Once completed, save and print the confirmation page with the barcode
Tip: Write down your Application ID number to resume the form if you need to stop halfway.
Choose the Right Visa Type for Your Purpose
Before scheduling your interview, it is essential to identify the correct visa according to the purpose of your trip. Here are the main options for Nigerians:
- B1/B2 (Business and Tourism): valid for tourism, visiting family, business meetings, or events.
- F1 (Student): for those accepted into a school, college, or university in the U.S. Allows full-time study and, in some cases, part-time work.
- H1B (Specialized Work): for qualified professionals with a job offer from a U.S. company.
- J1 (Exchange): intended for cultural, academic, or professional exchange programs of varying duration.
Choosing the wrong visa can compromise the entire process. When in doubt, always seek specialized guidance.
How to Schedule Your Interview in Lagos or Abuja
After completing the DS-160, the next step is to pay the consular fee and schedule your interview. Here’s how:
- Visit the official scheduling website
- Create an account with your email and password
- Pay the MRV fee (US$185 for B1/B2 and F1 visas, converted to naira at the day’s exchange rate)
- Choose either Abuja or Lagos for your interview
- Select an available date and time and confirm the appointment
- Print the confirmation with all details
Important: schedule in advance, as slots fill up quickly, especially during peak periods.
Documents Required on Interview Day
On the day of your interview for the US Visa Application in Nigeria, bring all required documentation. Being prepared avoids delays or complications.
Mandatory documents:
- Passport valid for at least 6 months
- DS-160 confirmation page with barcode
- Interview appointment confirmation
- Proof of MRV fee payment
- 1 recent photo in the required format (5x5cm, white background)
Additional documents (depending on the visa):
- Acceptance letter from an institution (for F1)
- Bank statements or proof of financial support
- Invitation or company letter (for business or work)
- Proof of ties to Nigeria (employment, property, family, studies)
Attention: avoid carrying large bags, electronics, or metallic objects — the consulate enforces strict security rules.
Costs and Timelines: What to Expect
When making a US Visa Application in Nigeria, you must pay the non-refundable consular fee of US$185, converted to naira. This fee is non-refundable, even in case of denial.
Other possible costs:
- Official photo: ₦2,000 to ₦5,000
- Printing and copies: ₦1,000 to ₦3,000
- Transport to Abuja or Lagos (if necessary)
- Accommodation expenses (if an overnight stay is needed)
Timelines:
- Average time to schedule an interview: 1 week to 1 month
- Visa issuance (if approved): 3 to 10 business days
Plan ahead, especially if you intend to study, travel for work, or attend events with fixed dates.
How to Succeed in the Visa Interview
The interview is one of the most important steps in a US Visa Application in Nigeria. Here are some tips to increase your chances of success:
- Tell the truth: answer clearly and objectively. Avoid contradictions and never invent information, as consulates verify every detail.
- Professional appearance: choose simple, clean, and discreet clothing. The goal is to convey seriousness and respect without exaggeration.
- Punctuality: arrive at least 30 minutes early. Being late can harm or even cancel your interview.
- Organized documents: bring only the requested papers, sorted and in a folder for easy review.
- Calm responses: stay composed and speak firmly. If nervous, take a deep breath before answering.
- Know your form: review DS-160 information beforehand, as the interviewer may ask for details you already declared.
- Clear purpose of travel: explain objectively the reason for your trip to the U.S., whether for tourism, study, or work.
What Happens After Approval or Denial
After completing the US Visa Application in Nigeria, your visa may be approved or denied.
If approved:
- You will be informed how and where to collect your passport with the visa.
- Respect the deadlines and addresses to avoid setbacks.
- Plan your trip according to the document’s validity.
If denied:
- The reason for denial will be provided by the consular officer.
- Don’t be discouraged — many people succeed on the second attempt.
- Correct errors or pending issues and be better prepared for the next interview.
- The process can be repeated whenever necessary, as long as adjustments are made.
Ready to Start Your US Visa Application in Nigeria?
Applying for a US Visa Application in Nigeria may seem complicated at first, but following the right guidelines makes the process much clearer and more accessible.
The key is preparation: gather all required documents, review each detail carefully, and organize yourself to meet important deadlines. Planning ahead not only reduces stress but also increases your chances of a smooth approval. Consider setting reminders, double-checking forms, and making copies of every document for added security.
By filling out the form calmly and preparing for the interview, you will be taking firm steps toward your goal of accessing new opportunities in the United States. Remember, patience, attention to detail, and confidence are essential — your thorough preparation will make the entire journey more manageable and rewarding.